Taking Control: DIY Appliance Repairs for Homeowners
Take charge of your appliances with DIY repairs. Learn troubleshooting tips and step-by-step solutions for common issues.
The Power of DIY Repairs and Maintenance
Taking control of DIY repairs and maintenance can be a rewarding experience for homeowners. Not only does it save money, but it also empowers individuals to tackle common issues that arise with household appliances. In this section, we will explore the benefits of DIY appliance repairs and the safety precautions and considerations to keep in mind.
Benefits of DIY Appliance Repairs
Performing DIY appliance repairs offers several advantages for homeowners. Here are some key benefits:
- Cost Savings: By handling repairs yourself, you can avoid the expense of hiring a professional technician. Simple repairs can often be done with basic tools and minimal investment, saving you money in the long run.
- Convenience and Time Efficiency: When an appliance breaks down, waiting for a technician’s appointment can be frustrating. With DIY repairs, you have the flexibility to address the issue immediately and get your appliance back in working order sooner.
- Enhanced Knowledge and Skills: DIY repairs provide an opportunity to learn about the inner workings of your appliances. As you gain experience, you’ll develop a better understanding of how they function, allowing you to troubleshoot and perform future repairs more efficiently.
- Empowerment and Self-Sufficiency: Being able to fix common appliance issues on your own empowers you as a homeowner. It gives you a sense of self-sufficiency and the confidence to handle other maintenance tasks around the house.
Safety Precautions and Considerations
While DIY appliance repairs can be rewarding, it’s important to prioritize safety. Here are some essential safety precautions and considerations to keep in mind:
- Unplug the Appliance: Before starting any repair work, always disconnect the appliance from the power source. This reduces the risk of electrical shock.
- Wear Protective Gear: Depending on the repair task, it may be necessary to wear protective gear such as gloves, safety goggles, and closed-toe shoes. This protects you from potential injuries and ensures a safe working environment.
- Follow Manufacturer’s Instructions: When performing repairs, consult the appliance’s manual or online resources provided by the manufacturer. Following the recommended guidelines helps ensure proper repairs and prevents damage to the appliance.
- Use the Right Tools: Utilize the appropriate tools for each repair task. Using improper tools can not only damage the appliance but also pose a risk to your safety.
- Know Your Limitations: While DIY repairs can be empowering, it’s important to recognize your own limitations. If a repair seems too complex or requires specialized knowledge, it may be best to consult a professional technician.
Helpful tip: if you can’t find the appliance manual, try searching for it on ManualsLib, a web repository for manuals for over 5 million products.
By understanding the benefits of DIY appliance repairs and prioritizing safety precautions, homeowners can confidently take on common repair tasks. Whether it’s troubleshooting a refrigerator, fixing a washing machine, or addressing issues with an oven or stove, the power to maintain and repair household appliances is in your hands. For more information on other DIY projects, check out our articles on DIY garage organization and DIY painting tips.

Common Appliance Repairs
Before calling a professional, many homeowners prefer to tackle common appliance repairs themselves. With some troubleshooting skills and a few basic tools, you can save time and money by resolving minor issues on your own. In this section, we will explore troubleshooting and basic repairs as well as the tools you’ll need to get started.
Troubleshooting and Basic Repairs
When faced with an appliance problem, it’s helpful to start with some troubleshooting steps to identify the issue. Here are a few common problems and possible solutions:
- Appliance not turning on: Check if the appliance is plugged in properly and that the circuit breaker hasn’t tripped. If the power supply is fine, the problem may lie with the appliance’s internal wiring or components.
- Strange noises or vibrations: Unusual noises or vibrations can indicate a loose part or a malfunctioning component. Inspect the appliance for any loose screws, bolts, or belts. If the issue persists, it may require further diagnosis and repair.
- Inconsistent temperature or performance: If your appliance is not maintaining the desired temperature or its performance is inconsistent, it could be due to faulty sensors, clogged filters, or other internal issues. Refer to the appliance’s manual for troubleshooting tips specific to your model.
Remember, safety should always be a top priority. If you’re unsure about how to diagnose or fix an issue, it’s best to consult a professional. Additionally, if the appliance is under warranty, attempting repairs yourself may void the warranty, so be sure to check the terms and conditions before proceeding.
Tools You’ll Need
To perform basic appliance repairs, it’s important to have a few essential tools on hand. Here are some tools that will come in handy for most repairs:
| Tool | Description |
|---|---|
| Screwdriver Set | A set of screwdrivers with different sizes and types (flathead and Phillips) for removing screws. |
| Multimeter | Used to measure electrical voltage, current, and resistance and diagnose electrical issues. |
| Pliers | Helpful for gripping, twisting, and removing small parts or wires. |
| Wire Cutters | Used for cutting or stripping wires during electrical repairs. |
| Nut Driver Set | Nut drivers are used to tighten or loosen nuts and bolts. |
| Adjustable Wrench | A versatile tool for loosening or tightening nuts, bolts, and fittings of various sizes. |
| Flashlight | Essential for illuminating tight spaces and inspecting hard-to-reach areas. |
| Electrical Tape | Used to insulate wires and secure connections. |
| Lubricant | Lubricants such as WD-40 can help loosen rusted or stuck parts. |
Having these tools readily available will enable you to handle many basic repairs and maintenance tasks around your home. However, keep in mind that certain repairs may require specialized tools or expertise. If you’re unsure about a repair or lack the necessary tools, it’s best to seek professional assistance.
By troubleshooting common appliance issues and having the right tools at your disposal, you can confidently tackle minor repairs and potentially save on repair costs. However, always exercise caution and prioritize safety. For more information on various DIY projects and repairs, visit our articles on DIY garage organization and DIY painting tips.

Refrigerator Repairs
Refrigerators are essential appliances in our homes, but they can sometimes encounter issues that require attention. By understanding common refrigerator problems and learning how to address them, homeowners can save time and money by performing DIY refrigerator repairs.
Common Refrigerator Issues and Solutions
Here are some of the most common problems that homeowners may encounter with their refrigerators, along with possible solutions:
| Problem | Possible Solution |
|---|---|
| Refrigerator not cooling | Check the temperature settings, clean the condenser coils, and ensure proper ventilation around the refrigerator. |
| Excessive frost or ice buildup in the freezer | Defrost the freezer and check the door gasket for any gaps or damage. |
| Water leakage inside or outside the refrigerator | Inspect the water supply line, drain pan, and check for any clogged or frozen drain tubes. |
| Strange noises coming from the refrigerator | Clean the condenser fan and motor, check for any loose or worn-out parts, and ensure the refrigerator is level. |
| Faulty ice maker | Inspect the water inlet valve, ensure the water line is clear, and check for any ice blockages in the ice maker mechanism. |
It’s important to note that some refrigerator repairs may require professional assistance, especially if they involve electrical components or complex technical issues. If you’re unsure about tackling a repair, it’s always best to consult a professional technician.
Steps for DIY Refrigerator Repairs
If you’re confident in your DIY skills and want to attempt refrigerator repairs yourself, here are some general steps to follow:
- Identify the problem: Determine the specific issue with your refrigerator by observing the symptoms and conducting basic troubleshooting.
- Gather the necessary tools: Before starting the repair, gather the tools you’ll need. These may include a screwdriver set, multimeter, pliers, and other common household tools.
- Refer to the manufacturer’s manual: Consult the refrigerator’s manual for specific instructions and troubleshooting tips provided by the manufacturer. This will help you understand the inner workings of your refrigerator and guide you through the repair process.
- Safety first: Always prioritize safety when working with appliances. Unplug the refrigerator from the power source before performing any repairs. If you’re dealing with electrical components, exercise caution and consider wearing protective gloves.
- Follow proper procedures: Carefully follow the steps outlined in the manufacturer’s manual or any reliable online resources. Be patient and take your time to avoid causing further damage.
- Test the repair: After completing the repair, plug the refrigerator back in and test it to ensure the problem has been resolved. Monitor the refrigerator for a period of time to ensure the repair was successful.
Remember, not all refrigerator repairs can be safely and effectively performed by homeowners. If you encounter a complex issue or are uncomfortable with the repair process, it’s best to seek professional assistance. With proper maintenance and occasional DIY repairs, you can extend the lifespan of your refrigerator and keep it running smoothly.
Washing Machine Repairs
When it comes to washing machine repairs, tackling the issues yourself can save you time and money. Understanding the common problems that can occur with washing machines and learning how to address them can help you keep your appliance running smoothly. In this section, we will discuss the most common washing machine issues and provide steps for DIY repairs.
Common Washing Machine Issues and Solutions
| Issue | Possible Cause | Solution |
|---|---|---|
| Washing machine not spinning | Broken belt or motor issue | Check and replace the belt or motor if necessary |
| Water not draining | Clogged or faulty drain pump | Clean or replace the drain pump |
| Leaking water | Damaged hoses or faulty water inlet valve | Inspect and replace damaged hoses or faulty water inlet valve |
| Excessive vibration or shaking | Unbalanced load or worn-out shock absorbers | Ensure the load is balanced and replace worn-out shock absorbers |
| Strange noises during operation | Loose or damaged components | Tighten or replace loose or damaged components |
| Foul odor | Mold or mildew buildup | Clean the washing machine, including the detergent dispenser and rubber seal |
Steps for DIY Washing Machine Repairs
- Safety First: Before starting any repairs, make sure to unplug the washing machine and turn off the water supply.
- Diagnose the Problem: Identify the specific issue your washing machine is experiencing by observing the symptoms and referring to the common issues listed above.
- Gather the Necessary Tools: Depending on the repair required, you may need basic tools such as a screwdriver, pliers, wrench, or socket set. Refer to our article on DIY home repairs for a comprehensive list of essential tools.
- Refer to the User Manual: Consult the user manual provided by the manufacturer for specific instructions on troubleshooting and repairing your washing machine. The manual may also include diagrams or illustrations to guide you through the process.
- Follow Proper Procedures: Follow the step-by-step instructions outlined in the user manual or any additional resources you find. Be cautious and take your time to avoid causing further damage.
- Order Replacement Parts: If necessary, identify the faulty component and order a replacement part from a reputable supplier. Make sure to match the part with the make and model of your washing machine.
- Perform the Repair: Carefully replace the faulty part or make the necessary adjustments according to the instructions provided. Double-check that everything is properly installed and secured.
- Test the Washing Machine: Plug the machine back in, turn on the water supply, and run a test cycle to ensure that the repair was successful. Monitor the machine for any signs of recurrence of the issue.
By following these steps, you can tackle common washing machine issues yourself and avoid the need for professional assistance. However, it’s important to remember that more complex problems may require the expertise of a qualified technician. If you’re unsure or uncomfortable with performing a repair, it’s best to seek professional help to avoid further damage to your washing machine.

Oven and Stove Repairs
When it comes to the appliances in your kitchen, the oven and stove are essential for preparing meals. However, like any other appliance, they can experience issues over time. Understanding common oven and stove issues and having the knowledge to tackle simple repairs can save you time and money. Here, we will explore some of the most common problems and provide steps for DIY oven and stove repairs.
Common Oven and Stove Issues and Solutions
| Issue | Possible Solution |
|---|---|
| Oven not heating up | Check if the heating element is faulty and replace if necessary. Ensure the oven is getting adequate power supply. |
| Uneven cooking or baking | Calibrate the oven temperature or adjust the oven racks to ensure proper heat distribution. |
| Gas stove burners not igniting | Clean the burner ports and ensure they are free from debris. Check the igniter and replace if faulty. |
| Electric stove burners not heating | Inspect the burner coils for any signs of damage and replace if needed. Check the connection between the burner and the socket. |
| Oven door not closing properly | Check the hinges and seals for any damage or misalignment. Adjust or replace them as necessary. |
Steps for DIY Oven and Stove Repairs
- Safety First: Before starting any repairs, ensure that the oven or stove is unplugged or the power supply is turned off. This will prevent any electrical accidents or injuries.
- Diagnostic Check: Identify the specific issue with your oven or stove by observing its behavior and testing different components. Refer to the owner’s manual for troubleshooting tips or check online resources for guidance.
- Gather the Required Tools: Some common tools you may need for oven and stove repairs include a screwdriver, pliers, multimeter, and replacement parts such as heating elements or igniters.
- Replace Faulty Parts: If you have identified a specific component causing the issue, follow the manufacturer’s instructions or online tutorials to safely remove and replace the faulty part. Ensure you have the correct replacement part before proceeding.
- Clean and Maintain: Regularly clean your oven and stove to prevent buildup of grease or debris, as these can affect their performance. Refer to our article on DIY home repairs for tips on maintaining your appliances.
It’s important to note that while some repairs can be done by homeowners, more complex issues may require professional assistance. If you are unsure about a repair or if it involves electrical or gas connections, it’s best to consult a qualified technician to ensure your safety and the proper functioning of your oven or stove.
By having a basic understanding of common issues and simple repair techniques, you can take control of maintaining your oven and stove. Remember to always prioritize safety and consult professional help when needed.
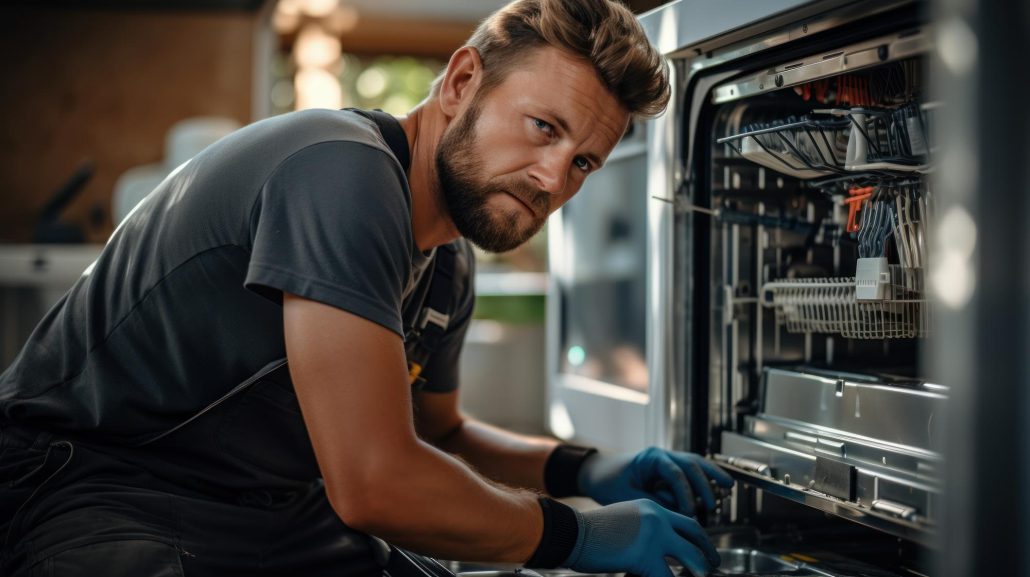
Dishwasher Repairs
When it comes to dishwasher repairs, tackling the issues yourself can save you time and money. Before reaching out to a professional, it’s worth exploring some common dishwasher problems and their solutions. With a few basic tools and some know-how, you may be able to resolve the issue on your own.
Common Dishwasher Issues and Solutions
| Issue | Possible Solution |
|---|---|
| Dishwasher not starting | Check if the dishwasher is properly plugged in and the circuit breaker is not tripped. |
| Poor cleaning performance | Ensure that the spray arms are unclogged and the dishwasher is not overloaded. Check for a faulty pump or worn-out spray arm seals. |
| Leaking dishwasher | Inspect the door gasket for any damage or debris. Tighten loose connections and valves. |
| Noisy dishwasher | Examine the spray arm, pump, and motor for any obstructions or signs of wear. Tighten loose components. |
| Foul odor from dishwasher | Clean the dishwasher filter, remove any food debris, and run a cleaning cycle with vinegar or a dishwasher cleaner. |
By identifying the specific issue you’re experiencing with your dishwasher, you can take appropriate steps to resolve it. Keep in mind that more complex issues or those involving electrical components may require professional assistance. For a comprehensive guide on other DIY home repairs, visit our article on DIY home repairs.

Steps for DIY Dishwasher Repairs
- Dishwasher not starting: Check the power supply by ensuring the dishwasher is plugged in and the circuit breaker is not tripped. If the power is on, examine the door latch and switch for any damage or misalignment.
- Poor cleaning performance: Start by cleaning the spray arms to remove any debris or mineral buildup. Ensure that the dishwasher is not overloaded as it can hinder proper water circulation. If the problem persists, inspect the pump and spray arm seals for wear and tear. Refer to your dishwasher’s manual for specific instructions on cleaning and maintenance.
- Leaking dishwasher: Inspect the door gasket for any signs of damage or debris. Clean the gasket and ensure it is properly seated. Check for loose connections and tighten them if necessary. If the leak persists, it may indicate a faulty inlet valve or a damaged tub. In such cases, it’s advisable to seek professional help.
- Noisy dishwasher: Begin by examining the spray arm, pump, and motor for any obstructions or damage. Remove any debris that may be causing the noise. Tighten loose components, such as the spray arm or pump housing. If the noise continues, it may be an indication of a faulty motor or worn-out parts that require replacement.
- Foul odor from dishwasher: Clean the dishwasher filter to remove any food particles or debris. Run a cleaning cycle with vinegar or a dishwasher cleaner to eliminate any lingering odors. Ensure that you are not leaving dirty dishes in the dishwasher for extended periods, as this can contribute to odor buildup.
Remember to always refer to your dishwasher’s manual for specific instructions and safety precautions. If you’re unsure about any repairs or feel uncomfortable handling certain components, it’s best to consult a professional technician to avoid any potential damage or risk. For more information on other home improvement projects, check out our articles on DIY garage organization and DIY painting tips.


Trackbacks & Pingbacks
[…] If you feel unsure or encounter persistent issues, consult a professional. […]
[…] on simple oven repair tasks helps you build practical skills and confidence. You learn how to disconnect power safely, use insulated tools, and identify common issues like […]
[…] Home improvement experts note that this approach offers cost savings, immediate convenience, and valuable hands-on experience. […]
Leave a Reply
Want to join the discussion?Feel free to contribute!