DIY Painting 101: Expert Tips for Homeowners
Master the art of DIY painting with expert tips and discover the secrets to prepare, choose the right paint, and perfect your technique.
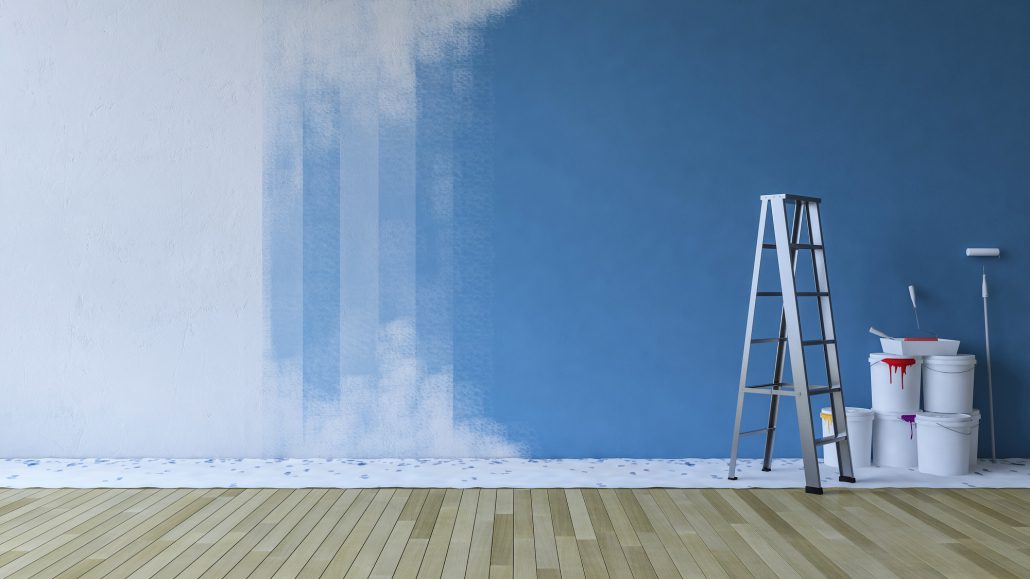
DIY Painting Basics
When it comes to giving your home a fresh new look, DIY painting can be a cost-effective and rewarding option. However, to achieve professional-looking results, it’s essential to understand the basics of proper preparation and have the right tools and materials at hand.
The Importance of Proper Preparation
Proper preparation is key to a successful DIY painting project. It ensures that the paint adheres well to the surface and provides a smooth and even finish. Here are a few important steps to consider:
- Clean the surface: Before starting any painting job, it’s crucial to clean the surfaces you plan to paint. Dust, dirt, and grease can interfere with the adhesion of the paint. Use a mild detergent and water solution to clean walls and other surfaces. Rinse thoroughly and allow them to dry completely.
- Repair any damage: Take the time to inspect the surfaces and repair any imperfections. Patch holes, cracks, or dents in the walls using spackle or putty. Sand down rough areas to create a smooth surface. Smooth out any visible brush or roller marks from previous paint jobs.
- Protect the surrounding areas: Cover furniture, floors, and fixtures with drop cloths or plastic sheets to prevent accidental paint splatters or spills. Use painter’s tape to mask off areas that you don’t want to paint, such as trim, windows, and baseboards. This will help create clean lines and a professional-looking finish.
Essential Tools and Materials
Equipping yourself with the right tools and materials is essential for a successful DIY painting project. Here are some of the must-have items:
- Paintbrushes: Invest in a variety of high-quality paintbrushes in different sizes and shapes to handle different areas and details. Synthetic brushes are often recommended for water-based paints, while natural bristle brushes work well with oil-based paints.
- Roller and roller covers: A roller is ideal for covering large areas quickly and efficiently. Choose a roller cover with the appropriate nap length, depending on the texture of your walls. A longer nap is suitable for rough surfaces, while a shorter nap is ideal for smooth walls.
- Paint trays and liners: Paint trays are essential for holding the paint while you work. Opt for sturdy trays with disposable liners for easy cleanup and to prevent cross-contamination of paint colors.
- Drop cloths and plastic sheets: Protect your floors and furniture with drop cloths or plastic sheets. These will catch any drips or spills, keeping your surfaces clean and undamaged.
- Painter’s tape: Painter’s tape is indispensable for creating clean lines and sharp edges. Use it to mask off areas that you want to keep paint-free, such as trim, windows, and baseboards.
- Paint: Choose the right type of paint for your project, whether it’s water-based latex or oil-based. Consider the finish as well, such as matte, eggshell, or semi-gloss, depending on the desired look and the area you’re painting.
By focusing on proper preparation and having the essential tools and materials, you’ll be well on your way to achieving professional-looking results with your DIY painting project. Remember to take your time, follow the manufacturer’s instructions, and consult our article on DIY home repairs for additional tips and guidance.

Preparing the Space
Before you embark on your DIY painting project, it’s important to properly prepare the space you’ll be working in. Taking the time to clear and protect your furniture and floors, as well as patching and repairing any wall imperfections, will help ensure a smooth and successful painting process.
Clearing and Protecting Furniture and Floors
To protect your furniture from accidental paint splatters or spills, it’s best to move it out of the room if possible. If moving the furniture is not feasible, you can cover it with plastic sheets or drop cloths to shield it from any potential paint damage. Secure the covers with tape or weights to keep them in place.
Similarly, it’s important to protect your floors from paint drips or spills. Lay down drop cloths or plastic sheets to cover the entire floor area where you’ll be working. Ensure the covers are secured and overlap them to create a continuous protective barrier. This will save you from the hassle of cleaning up paint stains later.
Patching and Repairing Walls
Before you start painting, it’s essential to inspect your walls for any imperfections that may need to be patched or repaired. Look for cracks, holes, or dents. These can be filled with spackling compound or putty. Use a putty knife to apply the compound, smoothing it out evenly. Allow it to dry completely before sanding it down to create a smooth surface. Our DIY home repairs article can provide you with more information on patching and repairing walls.
For larger wall repairs, such as significant holes or damaged areas, you may need to use a patching kit or consult a professional for assistance. Once the repairs are complete, sand the patched areas to ensure they blend seamlessly with the surrounding wall surface.
By taking the time to clear and protect your furniture and floors, as well as patch and repair any wall imperfections, you’ll create a suitable environment for a successful DIY painting project. Remember, proper preparation sets the foundation for a smooth and professional-looking paint job.
Choosing the Right Paint
When embarking on a DIY painting project, choosing the right paint is crucial to achieving a professional-looking result. Understanding different paint types and selecting the appropriate finish can make a significant difference in the final outcome.

Understanding Different Paint Types
There are various types of paint available, each formulated for different surfaces and purposes. The two main categories of paint are water-based (latex) and oil-based (alkyd) paints.
Water-based paints, also known as latex paints, are the most commonly used for interior painting projects. They are easy to clean up with water, have low odor, and dry relatively quickly. Water-based paints are suitable for a wide range of surfaces, including walls, ceilings, and trim. They also come in a variety of finishes, such as flat, eggshell, satin, and semi-gloss.
Oil-based paints, or alkyd paints, are known for their durability and smooth finish. They are commonly used for surfaces that require extra protection, such as metal, wood, and cabinets. Oil-based paints take longer to dry and require mineral spirits for cleanup. It’s important to note that oil-based paints emit strong fumes and should be used in well-ventilated areas.
Selecting the Right Finish
The finish of the paint determines the final appearance and durability of the painted surface. Here are some common paint finishes and their recommended applications:
| Finish | Description | Recommended Applications |
|---|---|---|
| Flat | Has no shine and provides a smooth, matte appearance. | Ceilings, low-traffic areas, and surfaces with imperfections. |
| Eggshell | Offers a subtle sheen and is more washable than flat paint. | Living rooms, bedrooms, and hallways. |
| Satin | Provides a soft sheen and is highly washable. | Kitchens, bathrooms, and high-traffic areas. |
| Semi-Gloss | Offers a noticeable shine and is highly durable and washable. | Trim, doors, cabinets, and furniture. |
It’s important to consider the function and location of the painted surface when selecting the paint finish. For example, in areas prone to moisture or heavy use, opting for a more durable finish like satin or semi-gloss would be beneficial. On the other hand, flat finishes can help conceal imperfections on ceilings or walls.
By understanding the different paint types and finishes, you can make an informed decision when choosing the right paint for your DIY painting project. Remember to consider the surface you are painting and the desired durability and appearance. For more tips on home maintenance and repairs, check out our articles on DIY garage organization and DIY home repairs.

Painting Techniques
Mastering the right painting techniques is essential to achieving a professional-looking finish. Whether you’re using a brush, roller, or need to cut in and edge, understanding the proper techniques will help you achieve the best results.
Using a Brush
Using a brush is a versatile technique that allows for precise application of paint. When using a brush, follow these steps for optimal results:
- Choose the right brush: Select a brush that suits the type of paint and surface you’re working on. A high-quality synthetic brush is generally a good choice for most projects.
- Load the brush: Dip the brush into the paint, about halfway up the bristles. Tap the brush gently against the side of the paint can to remove any excess paint.
- Apply the paint: Starting at the top corner of the surface, apply the paint in smooth, even strokes. Work in small sections, overlapping each stroke slightly to ensure even coverage.
- Brushing technique: Use long, steady strokes to apply the paint. For better control, hold the brush near the base of the handle. Avoid applying too much pressure, as it can cause streaks or brush marks.
- Cutting in: When painting along edges, corners, or trim, use the brush to create straight lines and smooth transitions. This technique, known as cutting in, helps achieve a clean and professional look.
Using a Roller
A roller is a popular choice for larger surfaces and can cover a larger area more efficiently. Follow these steps when using a roller:
- Choose the right roller: Select a roller cover with the appropriate nap (length of the fibers) for your project. Shorter naps are suitable for smooth surfaces, while longer naps work best on rough or textured surfaces.
- Prepare the roller: Before painting, dampen the roller cover with water and remove any loose fibers. If using a new roller cover, it’s recommended to remove any excess lint by rolling it on a piece of painter’s tape.
- Load the roller: Pour the paint into a roller tray and roll the roller back and forth in the paint, ensuring the cover is evenly coated. Roll the roller against the textured portion of the tray to remove excess paint.
- Apply the paint: Starting from an upper corner, roll the paint onto the surface using light, even pressure. Use a “W” or “M” motion to distribute the paint evenly. Avoid pressing too hard, as it can create lines and streaks.
- Overlap and blend: To achieve smooth and consistent coverage, slightly overlap each new roller stroke with the previous one. When moving to a new section, blend the edges of the freshly painted area with the unpainted area to avoid visible lines.

Cutting in and Edging
Cutting in and edging is the technique used to create sharp lines and define the boundaries between different surfaces. Follow these steps for a professional-looking finish:
- Prepare the area: Use painter’s tape to mask off areas that you don’t want to paint, such as trim, ceilings, or adjacent walls. Ensure that the tape is applied firmly and evenly to prevent paint bleeding.
- Cutting in: With a brush or a small roller, carefully paint along the edges where two surfaces meet, such as where a wall meets the ceiling or where different colors meet. Take your time and work slowly to achieve clean lines.
- Edging: When edging, paint along the trim, baseboards, or other architectural features using a brush or an edging tool. Keep a steady hand and use smooth, even strokes to create a seamless transition between the painted surface and the trim.
By mastering these painting techniques, you’ll be well-equipped to tackle your next DIY painting project. Remember, preparation and technique are key to achieving professional-looking results. For more home maintenance and repair tips, check out our articles on DIY garage organization, DIY home repairs, and DIY appliance repairs.
Tips for a Successful DIY Paint Job
To achieve a professional-looking paint job and ensure long-lasting results, it’s important to follow these tips for a successful DIY paint job. Properly priming the surface, applying multiple coats, and cleaning and maintaining your tools are key factors in achieving a beautiful and durable finish.
Properly Priming the Surface
Before applying paint, it’s crucial to properly prime the surface. Primer creates a smooth and even base for the paint to adhere to, improving its durability and enhancing the color vibrancy. Additionally, primer helps to seal porous surfaces, preventing the paint from being absorbed unevenly.
When selecting a primer, consider the type of surface you’re painting. Some surfaces, such as bare wood or previously painted surfaces with stains or discoloration, may require specific primers. It’s important to choose a primer that is compatible with both the surface material and the type of paint you will be using.
By applying a high-quality primer before painting, you can ensure better coverage, improved adhesion, and a longer-lasting finish.
Applying Multiple Coats
Applying multiple coats of paint is essential for achieving a smooth and consistent finish. While it may be tempting to apply a single thick coat to save time, this can lead to an uneven finish, visible brush or roller marks, and an overall unprofessional appearance.
When applying multiple coats, allow each coat to dry completely before applying the next. This will ensure that the paint adheres properly and minimizes the risk of streaks or smudges. Follow the manufacturer’s instructions for drying times between coats, as this can vary depending on the type of paint and environmental conditions.
Remember to use a high-quality paintbrush or roller for smooth and even coverage.
Cleaning and Maintaining Your Tools
Proper cleaning and maintenance of your painting tools is essential for their longevity and for achieving optimal results in future paint projects. Neglecting to clean your brushes and rollers can result in dried paint buildup, making them less effective and more difficult to use.
After each painting session, clean your brushes and rollers thoroughly. For brushes, rinse them with warm water and mild soap. Use your fingers to gently remove any excess paint, working from the base to the bristles. Rinse until the water runs clear, reshape the bristles, and allow them to air dry.
For rollers, remove as much excess paint as possible by rolling it across a scrap piece of cardboard or newspaper. Then, rinse the roller under warm water until the water runs clear. Alternatively, you can use a roller cleaner tool to remove the paint. Once clean, allow the roller to air dry before storing.
Proper cleaning and maintenance will extend the life of your brushes and rollers, ensuring they are ready for your next painting project.
By following these tips, you can ensure a successful DIY paint job that will enhance the beauty of your home and provide long-lasting results. Remember to properly prime the surface, apply multiple coats for a smooth finish, and clean and maintain your tools for future projects. For more DIY home maintenance ideas, check out our articles on DIY garage organization and DIY appliance repairs.


Leave a Reply
Want to join the discussion?Feel free to contribute!